Installing the roof flashing to your Polar King Unit and existing building is an important step to prevent excessive moisture and unnecessary runoff. The following steps and procedures will serve as a guide to correctly install the roof flashing to your Polar King Walk-In Cooler or Freezer. While Polar King does provide many of the items needed to perform the installation, there are a few additional items required to correctly install the roof flashing. These items include screws or fasteners as well as silicone sealant, both of which are needed to properly adhere the termination bar.
Items Provided by Polar King for Roof Flashing Installation Includes:
(1) 12” Elastoform Flashing Material
(1) 45° Cant Strip or Fillet Strip
(1) Firestone SA-1065 or Equivalent Splice Adhesive
(1) Pre-drilled Aluminum Termination Bar
Additional Items Needed Not Provided by Polar King Includes:
Mechanical fasteners or screws in order to secure the termination bar
(1) Tube of Silicone Sealant to finish adhering termination bar
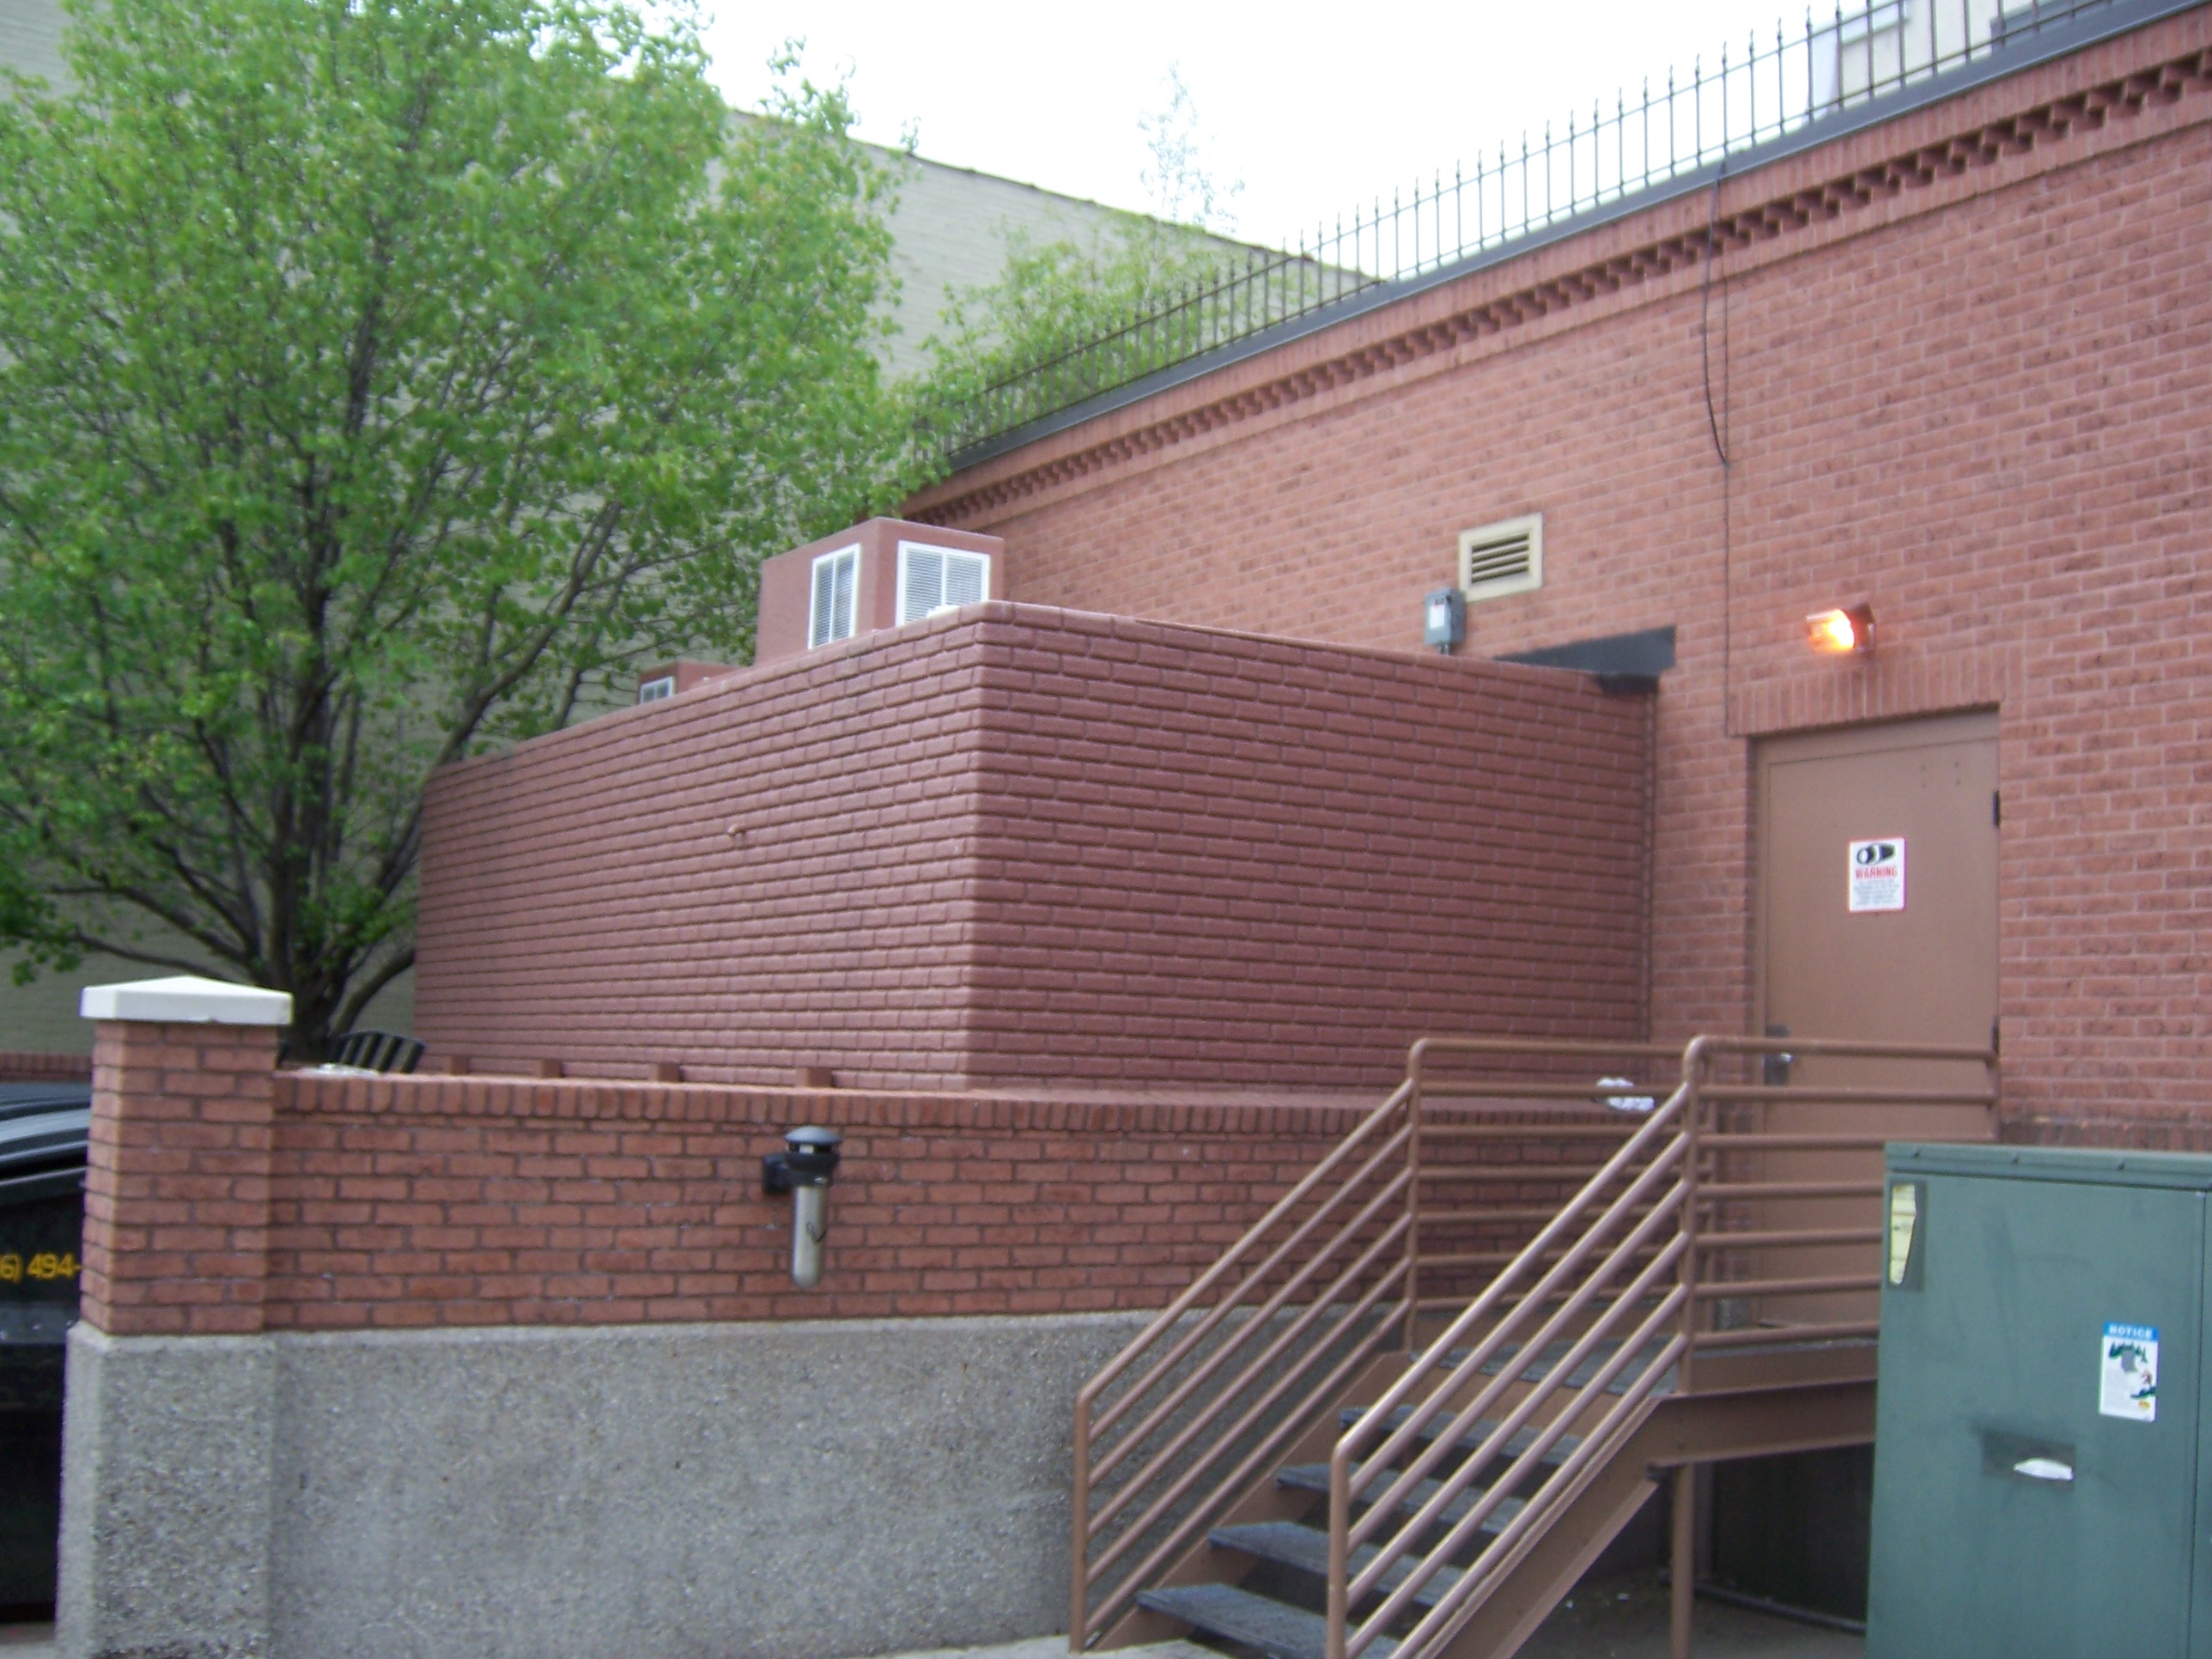
Before beginning the roof flashing installation, it is important to ensure both the roof of the Walk-In unit and existing wall are free of debris. Additionally, make sure the roof of the Walk-In is clean of dust and dirt at least 12” from the existing building. This is necessary for any adhesives and sealant to stick properly.
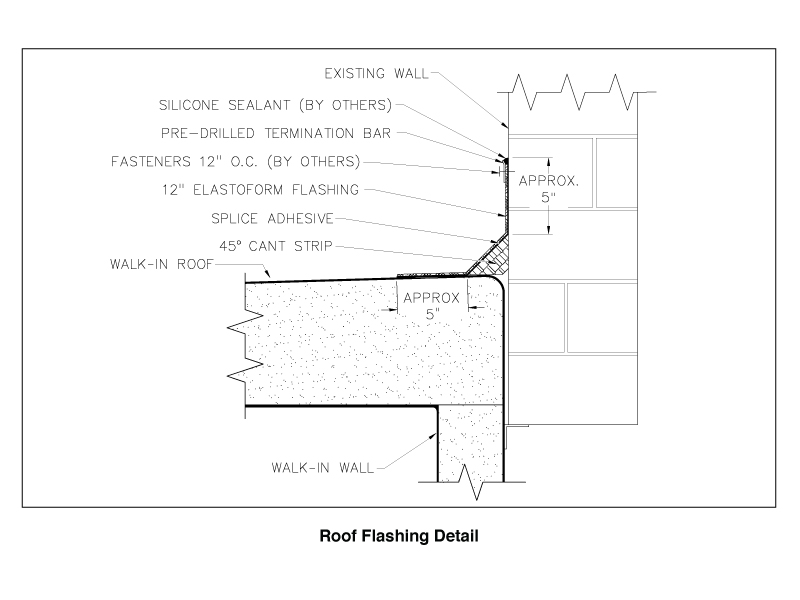
The Roof Flashing Detail Diagram, seen here and in your Polar King Owners Manual, shows the correct and approximate placement for the roof flashing materials. Reference this diagram for the required alignment and for accurate positioning for all components.
Steps to Install Roof Flashing
Place the 45° Cant Strip against building as shown on the roof flashing detail diagram.
Apply an even coat of splice adhesive approximately 5” wide to the roof of your Walk-In unit as well as the wall of the existing building.
Next, apply an even coat of splice adhesive to back side of the elastoform flashing material. You should allow this adhesive to set long enough to become tacky.
Once the elastoform flashing material is ready to be adhered, place the flashing face up onto the coated area of the Walk-In unit’s roof and the existing wall. While placing the flashing material, make sure to properly line it up and keep it centered on the cant strip.
Apply and keep pressure to the flashing for several minutes until a good bond is formed between the flashing and the roof and wall.
After the splice adhesive is suitably dry, remove the film cover from the front side of the elastoform flashing material.
Referencing the roof flashing detail diagram, install the supplied termination bar over the top edge of the elastoform flashing material. Using screws or fasteners, attach the termination bar approximately 12” on center. (Screw or fasteners are not included in the roof flashing installation kit)
To finish the roof flashing installation, apply an even bead of silicone sealant to top of termination bar. (Silicone sealant also not included in the roof flashing installation kit)
After letting the silicone sealant dry for the recommended time, the flashing assembly can be painted with any outdoor, oil or latex paint.
Following the Polar King Roof Flashing Installation Procedures will ensure proper attachment of the roof flashing and can help prevent damage to your walk-in unit. Failure to follow these recommendations could result in injury or damage to one or more components of your Polar King Unit.

As the industry’s #1 manufacturer of outdoor fiberglass Walk-In Coolers and Walk-In Freezers, Polar King units are designed to endure even the most rugged conditions and climates. All of our Walk-In Coolers and Freezers are delivered fully assembled and require only a simple electrical connection to put them into operation. With a 100% seamless fiberglass design, Polar King offers the industry’s only one piece, outdoor units. To learn more about the fiberglass advantage, contact Polar King today!
