
The Installation of sidewall flashing is necessary if there is an existing junction between the wall of your Polar King unit and a sloped portion of the roof. Utilizing sidewall flashing will help properly divert rainwater as well as prevent moisture buildup and standing water. The following steps and procedures will serve as a guide to correctly install the sidewall flashing to your Polar King Walk-In Cooler or Freezer. While Polar King does provide the sidewall flashing material needed to perform the installation, there are a few additional items required to correctly install the sidewall flashing. These items include screws or rivets, construction adhesive, and silicone sealant. These items are required to properly adhere and position the sidewall flashing material.
Items provided by Polar King for Sidewall Flashing Installation Includes:
(1) PVC Sidewall Flashing (1” x 5” L-Shape PVC Material)
Additional Items Needed Not Provided by Polar King Includes:
Mechanical fasteners, screws, or rivets in order to secure sidewall flashing
(1) Container of Construction Adhesive
(1) Tube of Silicone Sealant to finish adhering sidewall flashing
Scissors or a Knife to trim sidewall flashing material
Steps to Install Sidewall Flashing
Before beginning the sidewall flashing installation, it is important to ensure both the roof of the Walk-In unit and existing wall are free of debris. Additionally, make sure the roof of the Walk-In is clean of dust and dirt at least 12” from the existing building. This is necessary for any adhesives and sealant to stick properly.
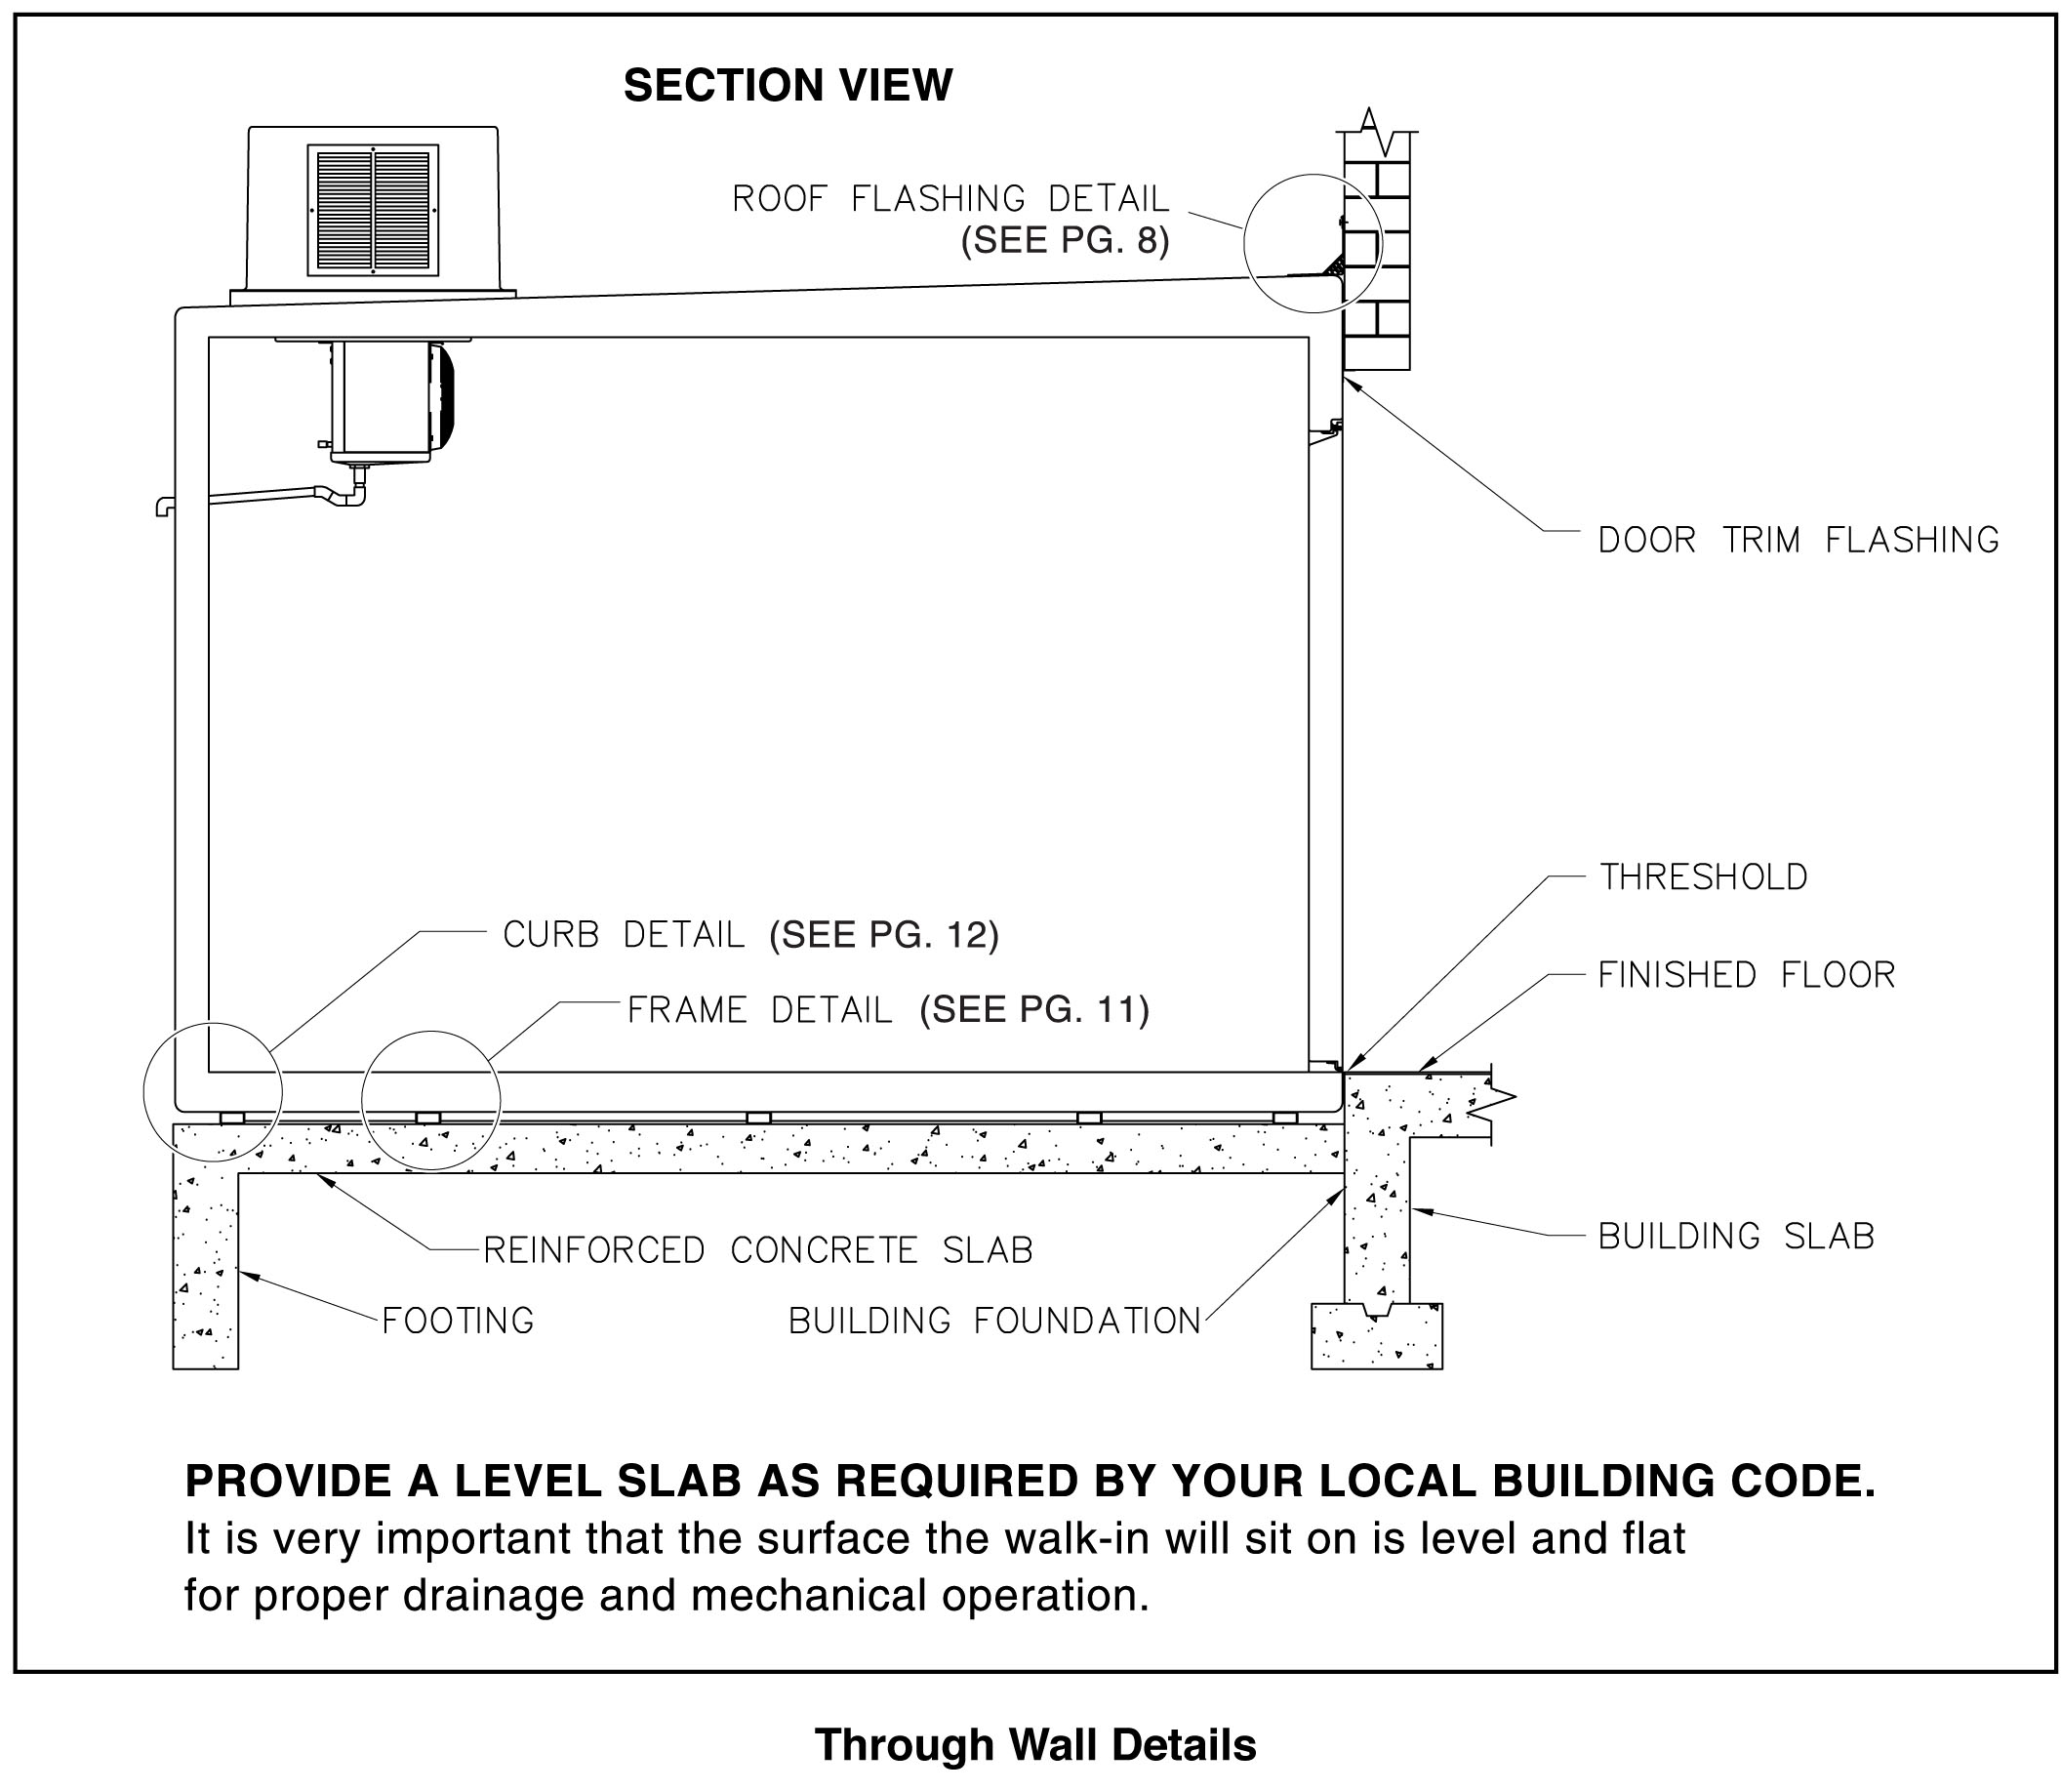
The Sidewall Flashing Detail Diagram, seen here and in your Polar King Owners Manual, shows the correct and approximate placement for the sidewall flashing materials. Reference this diagram for the required alignment and for accurate positioning for all components.
Steps to Install Sidewall Flashing
Align the PVC Sidewall Flashing against the building and your Polar King Walk-in Unit.
Depending on the size and positioning of your Walk-In Unit, it may be necessary to trim the sidewall flashing material. Using a pair of scissors or a knife carefully cut the sidewall flashing material to ensure a proper fit.
Note: Sidewall flashing may be applied with short leg sticking out or in.
Next, apply a coat of heavy duty construction adhesive to the area the flashing will be attached.
Line up the sidewall flashing material to the construction adhesive that has been applied and press firmly.
Attach mechanical fasteners, screws, or rivets to hold the sidewall flashing in place until the construction adhesive sets.
After the construction adhesive has properly set to the manufactures specifications, apply a bead of silicone sealant to finish the Sidewall Flashing installation.
Following the Polar King Sidewall Flashing Installation Procedures will ensure proper attachment of the sidewall flashing and can help prevent damage to your Walk-In unit or building. Failure to follow these recommendations could result in injury or damage to one or more components of your Polar King Unit.
As the industry’s #1 manufacturer of outdoor fiberglass Walk-In Coolers and Walk-In Freezers, Polar King units are designed to endure even the most rugged conditions and climates. All of our Walk-In Coolers and Freezers are delivered fully assembled and require only a simple electrical connection to put them into operation. With a 100% seamless fiberglass design, Polar King offers the industry’s only one piece, outdoor units. To learn more about the fiberglass advantage, contact Polar King today!
